With the in-person signing, you can sign and collect signatures directly in the presence of all the parties.
To perform an in-person signing session with the Grabsign app, follow these steps:
1.. Click on the ‘New Document’ button on the dashboard or click the ‘New Document’ in the left side navigation bar.
2. Upload the document you want to use. You can either drag and drop the file you will be using or click anywhere in the box to upload the document from your PC. You can also use the already saved template to create a new document. For this, click on the ‘Use Template’ button and click ‘Next’!
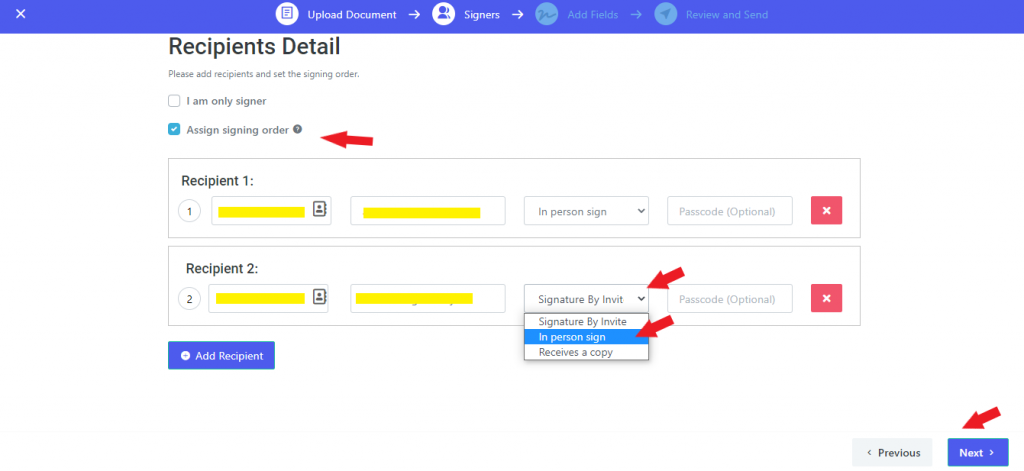
3. Add the Recipients and check the ‘Assign the Signing Order’ checkbox if it is required.
4. Select the ‘In-Person sign’ option against each recipient and click ‘Next’!

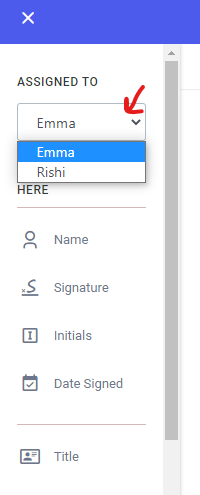
5. Prepare the document and assign the fields to all the signers. You can choose the respective signer by selecting the signer on the top in the left side navigation bar.

6. Once you have prepared the document and assigned the fields to all the signers, click ‘Next’!
7. If you want to add any message or your brand settings to the document, add it and click ‘Send’!
8. Hand the device to the signer.
Have the signer complete the following steps:
- Tap ‘Review and Sign’ document.
- Tap the signature tag and tap a signing option that is the draw, type, or upload, and click ‘Save Signature’!
- Tap the ‘Submit’ button and pass control to the next signer.
After completing all the signatures, you can access the document in the Audit Trail.
